Photo by PAUL SMITH on Unsplash
Monitoring and measuring React Native performance
We want to make our apps faster, but how do we know where to start?
Improving performance in a React Native app can sometimes feel like a thankless task - you might spend hours refactoring and optimising, but how can you tell if it's helping? When developing for the web there are a lot of tools that can help with performance measuring, but it does seem to be a lot harder on mobile with a fair amount of guesswork and manual testing.
There are a few things that are often thought of as optimisation such as using UseMemo and PureComponent but incorrect use of these can cause your app to slow down. So before reaching for these, it is important to be able to accurately identify the problem areas, and measure the performance before and after changes. Otherwise, we could spend hours making optimisations which at best do nothing, and at worst, make our app slower. I've tried to list below a few things to try when looking to identify and measure any problem areas.
Identifying slow components
A user will experience the app as ‘slow’ when the frames per second (FPS) drop below 60. So if the UI is changing, all the logic needs to have finished in 16ms for it to appear smooth. If it takes longer than this, you will ‘drop a frame’ and the UI will seem unresponsive. Anything over 100ms is bad and will be felt by the user.
To help us assess the FPS speed we can use the performance monitor
On an iOS simulator, go to the menu: Device->shake->show Perf monitor

This shows the FPS for the UI thread and the JS thread. If these drop a long way below 60 this can indicate an issue. Issues on the JS thread can indicate heavy computation or a lot of rendering. Issues on the UI might indicate issues with animations.
If animations are causing the app to slow down, using libraries like Reanimated2 instead of the React Native Animated API can help shift the load away from the JS thread and put it onto the UI thread instead, allowing the JS thread to get on with the important computational logic, helping the app to feel smoother and faster.
The performance monitor also shows the RAM. This can be useful when identifying slow areas in your app. For example, if you see the RAM continuing to rise once navigating to a screen and back again it could indicate that you have a memory leak.
Profiling components
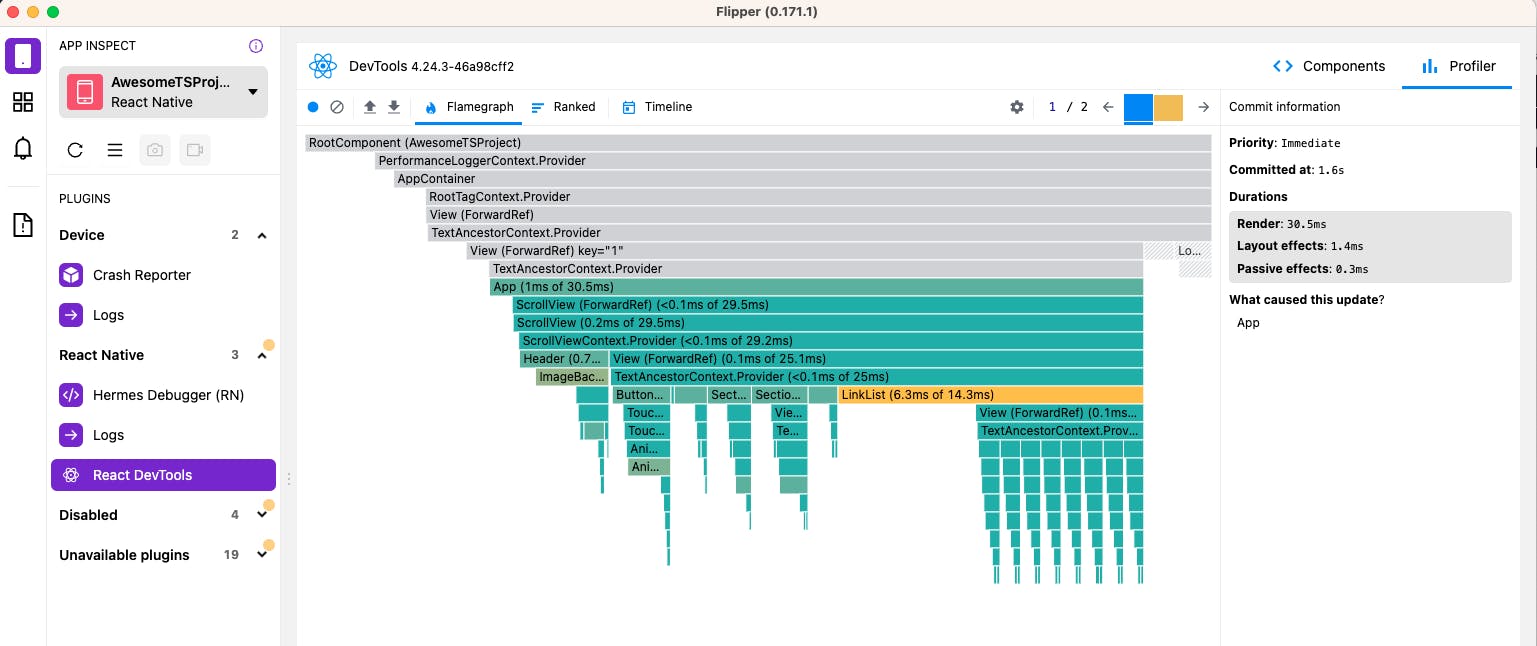
Using Flipper's React DevTools plugin we can get some idea of where our computing power is being spent as it shows us a flame graph of the time spent rendering each component on the screen. It can be useful when trying to identify components that are re-rendering unnecessarily.
Ensure the ‘Record why each component rendered’ checkbox is checked in the devTools settings:

Use the blue dot button in the top left corner to record an action. The flame graph will show the components that rendered during that action - and why. Grey items are not rendering so are fine. Using the ‘ranked’ display shows the slowest components first. Yellow ones indicate a slow component. It can also be worth seeing if any green ones are repeated more than you think they should be.

Try to get a short recording/snapshot that is repeatable to see any patterns emerge. In truth, I find it can be quite hard to decipher the flame graph unless something is glaring.
Performance assessment
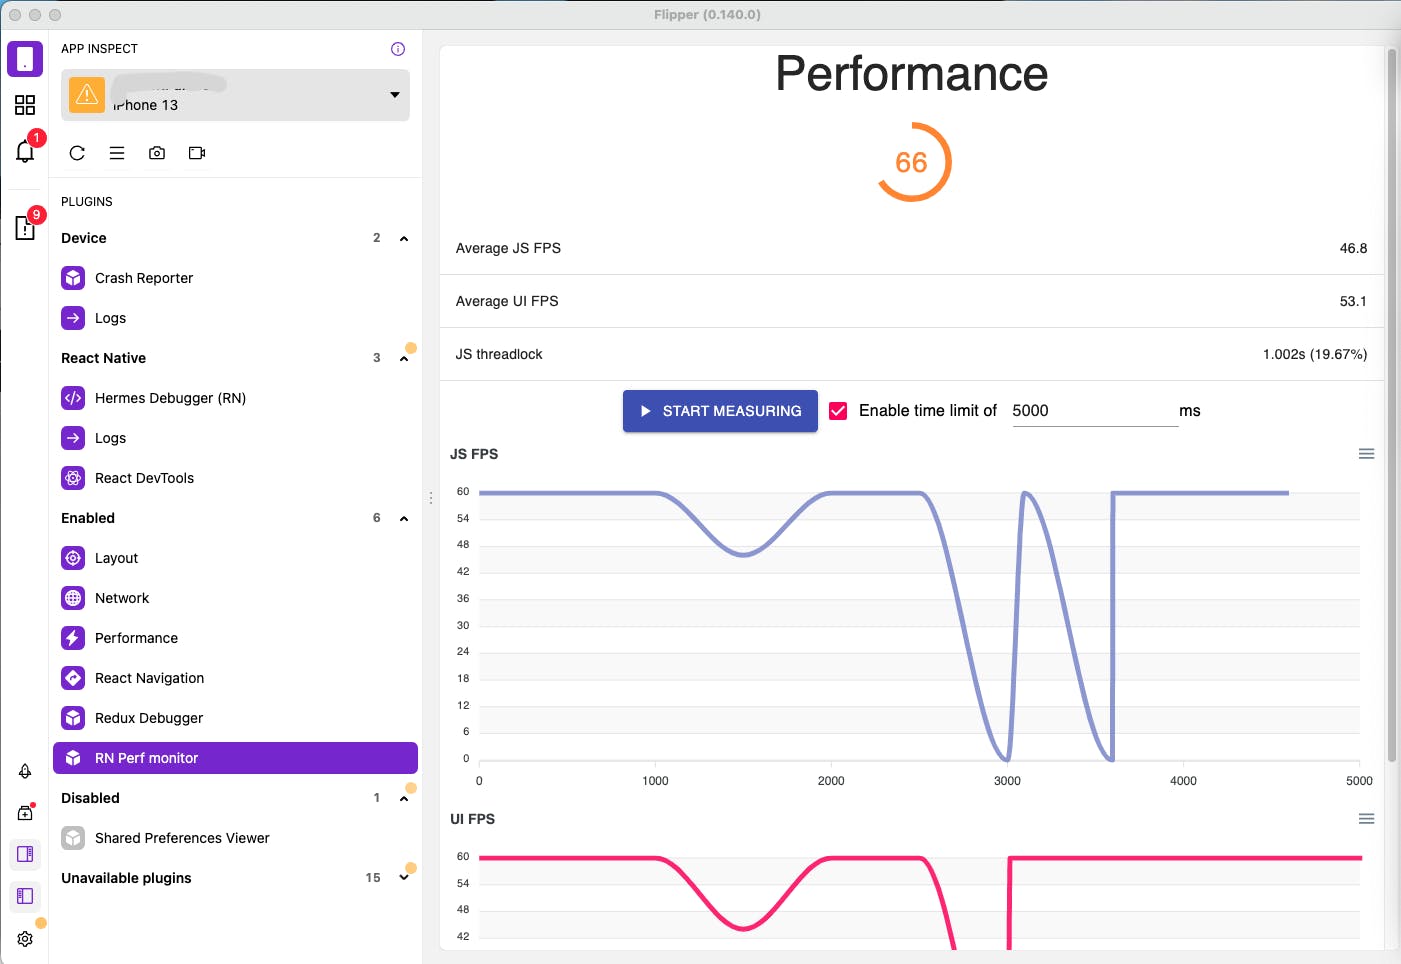
Once you have identified an area of the code where you think performance could be improved, you can use the react native performance tool to get an idea of the current performance before making changes.
Install the ‘rn-perf-monitor’ plugin on Flipper. It will require some setup (see docs) and will be added to your ‘disabled plugins’ so you will need to enable it. You can then set a time limit and test the area you want to improve. Similar to the devTools flamegraph, it is helpful to be able to record a short and repeatable snapshot (which is easier said than done) and do multiple readings to take an average score.

Once you have made a change to the code, run the tests again to see if it has had the desired effect on performance. I would warn that the results are not always very consistent, so I'm not 100% confident in the accuracy of the tool - or perhaps it is simply the nature of having to manually stop and start the test. In this blog, the creators of the tool explain how to use this in combination with automated gestures, programmed via the command line. I have not tried this, but it would make the tests more accurate, especially for things like testing scrolling elements.
Marking a point and timing code
For assessing the amount of time a chunk of code is taking to run, we can use performance.mark from react-native-performance
    performance.mark('suspected_slow_event'); // mark the start point

  /// code we want to test goes here

    performance.measure('suspected_slow_event'); // and the end point
    console.log(performance.getEntriesByName('suspected_slow_event'));
In truth, I have not found many use cases for measuring code performance in this way in React Native yet, but it's good to know about it!
Resources
Excellent article from the creators of the performance plugin, going into more depth on how to use the devTools flame graph in combination with the performance tool: Measuring and improving performance in React Native
Download the Ultimate Guide to React Native Optimization {callstack}
5 Tips to Improve the Performance of Your React Apps | DigitalOcean

